Hey there! As a supplier of decorative lighting sketch lamps, I've been asked a lot about the best angle to sketch these beauties. It's not just about making them look good on paper; it's about capturing their essence and potential in real - life settings. So, let's dive right into it.
Understanding the Basics of Sketching Angles
When we talk about sketching a decorative lighting lamp, the angle we choose can completely change how the lamp is perceived. An angle can highlight the lamp's unique features, hide its flaws, or create a sense of depth and dimension.
For instance, a top - down angle can give you a clear view of the lamp's overall shape and the distribution of light sources. It's great for getting a bird's - eye perspective, especially if the lamp has an interesting geometric design or multiple tiers. Imagine sketching a chandelier from above. You can easily show off the arrangement of its arms, the placement of the bulbs, and the intricate details of its framework.
On the other hand, a side - on angle can emphasize the lamp's height and profile. This is particularly useful for floor lamps or tall wall - mounted fixtures. It allows you to showcase the curves, the tapering of the body, and any decorative elements that run along the length of the lamp.
Front - on Angle: The Classic Approach
The front - on angle is a tried - and - true method for sketching decorative lighting lamps. It gives a straightforward view of the lamp, making it easy for the viewer to understand its basic form. This angle is great for highlighting the main features of the lamp, such as the shade design, the shape of the base, and the position of the light source.
When sketching from the front, you can clearly show the symmetry of the lamp. Many decorative lamps are designed with symmetrical elements, and a front - on view makes this symmetry stand out. It's also ideal for lamps with detailed facades, like those with ornate patterns on the shade or the base.
However, the front - on angle can sometimes be a bit flat. It may not convey the full three - dimensionality of the lamp, especially if it has complex shapes or multiple layers. To add some depth, you can play with shading and highlights. Darken the areas that are in shadow and add bright spots to represent the light reflection.
Oblique Angle: Adding Drama and Depth
An oblique angle, which is somewhere between the front and the side, is a fantastic way to add drama and depth to your sketch. This angle allows you to show multiple sides of the lamp at once, creating a more dynamic and engaging image.
By choosing an oblique angle, you can reveal hidden details that might not be visible from other angles. For example, if the lamp has a decorative element on the back or a unique shape that curves away from the front, an oblique view will let you showcase these features.
Moreover, an oblique angle can create a sense of perspective. The parts of the lamp that are closer to the viewer will appear larger, while the parts that are farther away will seem smaller. This gives the sketch a more realistic and immersive feel.
Bird's - Eye View: For Complex Designs
As mentioned earlier, the bird's - eye view, or the top - down angle, is perfect for lamps with complex designs. It's especially useful for pendant lamps, chandeliers, and table lamps with elaborate structures.
When sketching from above, you can show the overall layout of the lamp, including the arrangement of the bulbs, the pattern of the wires or chains, and the shape of the supporting framework. This angle also allows you to see how the light will spread out from the lamp, as you can visualize the space around it.
To make your top - down sketch more interesting, you can add some perspective lines. Draw lines that converge towards a vanishing point to give the impression of depth. You can also use different colors or tones to represent the different parts of the lamp and the surrounding area.
Ground - Level Angle: For a Different Perspective
A ground - level angle, where you sketch the lamp as if you're looking up at it from the floor, can create a unique and powerful effect. This angle is great for emphasizing the height and grandeur of the lamp, especially floor lamps or large - scale fixtures.
When using a ground - level angle, the lamp appears to tower over the viewer, creating a sense of awe. It can also highlight the base of the lamp, which might have interesting details like decorative feet or a heavy, stable foundation.
However, sketching from the ground - level angle can be a bit challenging. You need to pay close attention to the perspective and the distortion of the lamp's shape. The top of the lamp will appear smaller than the bottom, and the sides will seem to converge as they go up.
Choosing the Right Angle for Different Types of Lamps
Now, let's talk about how to choose the best angle for specific types of decorative lighting lamps.
Floor Lamps
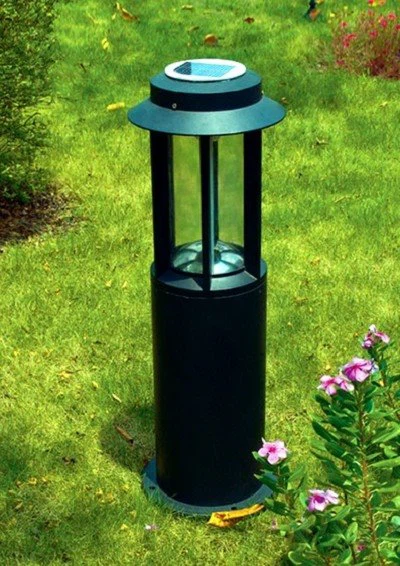
For floor lamps, a side - on or an oblique angle is often the best choice. These angles allow you to show the lamp's height and the way it curves or tapers from the base to the top. You can also highlight any decorative elements, such as the finial on the top or the decorative rings around the body.
Take a look at our Induction Foot Lamp with Motion Sensor. This lamp has a unique design with a motion - sensing feature. An oblique angle would be perfect for sketching it, as it would show both the front and the side, revealing the sensor location and the overall shape of the lamp.
Wall Lamps
Wall lamps can be effectively sketched from a front - on or a side - on angle. A front - on view will show the design of the shade and the way the light projects onto the wall. A side - on angle, on the other hand, can emphasize the lamp's profile and how it attaches to the wall.
Our Smart Voice - ControlLED Wall Lamp is a great example. Sketching it from the side would let you showcase its sleek and modern design, as well as the way it blends with the wall.
Landscape Lamps
Landscape lamps, such as the Programmable Ground - Buried Landscape Lamp, are often best sketched from an oblique or a top - down angle. An oblique angle can show the lamp's position in the landscape, along with its interaction with the surrounding environment. A top - down view can highlight the shape of the lamp and how it fits into the ground.
Tips for Sketching from Different Angles
Regardless of the angle you choose, there are some general tips that can help you create a great sketch.
First, start with a light outline. Use a pencil to lightly draw the basic shape of the lamp. This will help you get the proportions and the overall layout right before you start adding details.
Next, pay attention to the details. Look closely at the lamp and note down all the small features, such as the texture of the material, the pattern on the shade, and the shape of the light bulb. These details will make your sketch more realistic and engaging.
Finally, practice shading and highlighting. Shading is what gives your sketch depth and dimension. Use a darker pencil or add charcoal to create shadows, and use an eraser to add highlights.

Conclusion
In conclusion, there isn't a one - size - fits - all answer to the question of the best angle to sketch a decorative lighting lamp. It depends on the type of lamp, its design, and the message you want to convey through your sketch.
Whether you choose a front - on angle for a classic look, an oblique angle for drama, or a top - down view for complex designs, the key is to capture the essence of the lamp. By experimenting with different angles and techniques, you can create sketches that truly showcase the beauty and functionality of our decorative lighting lamps.
If you're interested in our range of decorative lighting sketch lamps or have any questions about sketching techniques, feel free to reach out to us. We're always happy to have a chat and discuss potential procurement opportunities.
References
- "Sketching Basics: Understanding Angles and Perspective" by Artincontext.org
- "Lighting Design: A Comprehensive Guide" by LightingAssociation.com


