Hey there! As a supplier of waterproof foot lamps, I'm stoked to share with you how to mount one on a wall. Whether you're looking to add some cool lighting to your outdoor space or need a practical solution for a wet area, a waterproof foot lamp can be a game - changer.
Why Choose a Waterproof Foot Lamp?
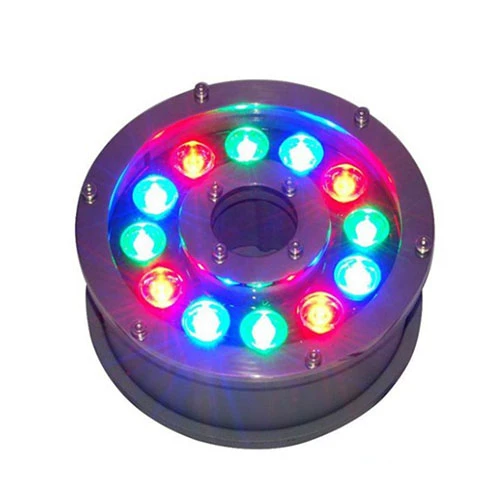
First off, let's talk about why you'd want a waterproof foot lamp. These lamps are designed to withstand all kinds of weather conditions. Rain, snow, or high humidity - they can take it. They're perfect for outdoor patios, decks, pool areas, and even in bathrooms. Plus, they add a unique and stylish touch to your space.
We offer a variety of waterproof foot lamps, including the Weather - Resistant Underwater Lamp. This lamp is not only waterproof but also looks great underwater, creating a beautiful lighting effect for your pool or pond.
Tools You'll Need
Before you start mounting your waterproof foot lamp, you'll need to gather some tools. Here's what you'll typically need:
- A drill: You'll use this to make holes in the wall for mounting. Make sure you have the right drill bits for the type of wall you're working on. For example, if it's a concrete wall, you'll need a masonry drill bit.
- Screwdriver: To tighten the screws that hold the lamp in place.
- Measuring tape: To ensure you're mounting the lamp at the right height and spacing.
- Pencil: To mark the spots where you'll drill the holes.
- Level: This helps you make sure the lamp is straight.
Preparing the Wall
The first step in mounting your waterproof foot lamp is to prepare the wall.
- Clean the Wall: Use a damp cloth to clean the area where you'll be mounting the lamp. This removes any dirt, dust, or debris that could prevent the lamp from sticking properly.
- Locate the Studs (if applicable): If you're mounting the lamp on a wooden wall, it's a good idea to locate the studs. You can use a stud finder for this. Mounting the lamp on a stud provides extra support.
- Mark the Mounting Points: Use your measuring tape and pencil to mark the spots where you'll drill the holes. Make sure you follow the instructions that came with your lamp for the correct spacing and height.
Mounting the Bracket
Most waterproof foot lamps come with a mounting bracket. Here's how to install it:
- Align the Bracket: Place the bracket against the wall at the marked points. Use a level to make sure it's straight.
- Drill the Holes: Once the bracket is aligned, use your drill to make holes in the wall. Be careful not to drill too deep.
- Insert the Wall Anchors: If you're not mounting on a stud, insert wall anchors into the holes. These help hold the screws in place.
- Attach the Bracket: Use your screwdriver to attach the bracket to the wall using the screws provided. Make sure the screws are tight.
Connecting the Wiring
Now it's time to connect the wiring. This is an important step, so make sure you follow the instructions carefully.

- Turn off the Power: Before you start working on the wiring, turn off the power at the circuit breaker. This prevents the risk of electric shock.
- Connect the Wires: Match the wires from the lamp to the wires in the wall. Usually, there will be a black (hot), white (neutral), and green or bare copper (ground) wire. Connect them using wire nuts. Make sure the connections are tight.
- Test the Connection: Once the wires are connected, turn the power back on at the circuit breaker and test the lamp. If it doesn't work, double - check your connections.
Attaching the Lamp to the Bracket
After the wiring is connected, it's time to attach the lamp to the bracket.
- Align the Lamp: Place the lamp on the bracket and align it with the holes.
- Secure the Lamp: Use the screws provided to secure the lamp to the bracket. Make sure the lamp is firmly attached.
Final Checks
Once the lamp is mounted, there are a few final checks you should do:
- Check the Level: Use a level to make sure the lamp is still straight. If it's not, adjust it.
- Test the Lamp Again: Turn the power on and off a few times to make sure the lamp is working properly.
- Inspect the Seals: Check the seals on the lamp to make sure they're intact. This helps keep water out.
Other Lamp Options
In addition to our waterproof foot lamps, we also offer other great lighting options. Check out our Adjustable Lighting Sketch Lamp. This lamp allows you to adjust the lighting angle, giving you more control over the illumination. And for those looking to add some high - tech charm to their outdoor spaces, our Smart City Decoration Landscape Lamp is a great choice. It can be controlled remotely and adds a modern touch to any area.
Contact for Purchase
If you're interested in our waterproof foot lamps or any of our other lighting products, we'd love to hear from you. Whether you're a homeowner looking to spruce up your outdoor space or a contractor working on a big project, we have the right lighting solutions for you. Reach out to us to start a purchase negotiation. We're committed to providing high - quality products and excellent customer service.
References
- General knowledge of lighting installation techniques
- Manufacturer's instructions for waterproof foot lamps


