Hey guys! I'm a supplier of solar outdoor landscape lamps, and today I'm gonna share with you how to install solar outdoor landscape lamps on a slope. It might seem a bit tricky at first, but with the right steps and a bit of know - how, you can have your slope looking amazing with beautiful solar lights in no time.
Why Choose Solar Landscape Lamps?
First off, let's talk about why solar landscape lamps are a great choice, especially for slopes. Solar lamps are eco - friendly. They run on energy from the sun, which means you're saving on electricity bills and reducing your carbon footprint. They're also super easy to install since you don't have to deal with any messy wiring. And for slopes, where running electrical cables can be a real pain in the neck, solar lamps are a no - brainer.
Planning the Installation
Before you start digging and placing your lamps, you need to do some planning.
- Assess the Sunlight: The first thing you gotta do is check how much sunlight your slope gets. Solar lamps need sunlight to charge, so pick spots where the lamps will get at least 6 - 8 hours of direct sunlight a day. Walk around the slope at different times of the day to see where the sun hits the most.
- Design Your Lighting Layout: Think about how you want your slope to look at night. Do you want to highlight certain plants, paths, or architectural features? You can create a focal point by placing a few brighter lamps in a cluster. Maybe you want to line a walking path on the slope with evenly spaced lamps. Sketch out a rough plan on paper so you have a clear idea of where each lamp will go.
Selecting the Right Lamps
As a solar outdoor landscape - lamp supplier, I know there are tons of options out there. Here are a few types that work great on slopes:
- Motion Sensor Ground - Buried Landscape Lamp: These are awesome for slopes. They're designed to be buried in the ground, so they won't get in the way. The motion sensor feature is really handy. It can detect movement and turn on the light, which is great for security and adding a bit of drama. You can check out our Motion Sensor Ground - Buried Landscape Lamp for more details.
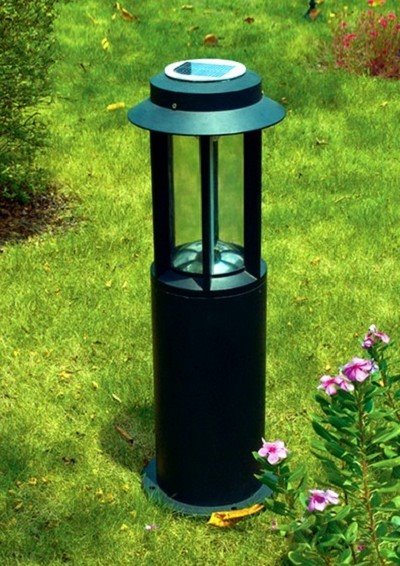
- Die - Casting Aluminum Landscape - Lamp: These lamps are durable and can withstand the elements. The die - casting aluminum construction makes them resistant to rust and corrosion, which is important for outdoor use, especially on slopes where they might be exposed to more moisture. Check out our Die - Casting Aluminum Landscape - Lamp if you're interested.
- Flexible Dimmable Wall Lamp: If you have walls or retaining structures on your slope, these lamps are a great option. You can adjust the brightness according to your needs. They're perfect for creating a cozy and inviting atmosphere. Have a look at our Flexible Dimmable Wall Lamp to see if it suits your project.
Installation Steps
Step 1: Prepare the Tools
You'll need a few basic tools for the installation. These include a shovel, a level, a tape measure, and a small hand - trowel. Make sure all your tools are in good condition before you start.
Step 2: Mark the Lamp Locations
Using your layout plan, mark the spots where you'll be placing the lamps. You can use stakes or small flags to mark these locations clearly. Make sure the distances between the lamps are consistent if you're creating a pattern, like lining a path.
Step 3: Dig the Holes
For ground - buried lamps, use the shovel or hand - trowel to dig holes. The depth and width of the holes will depend on the size of the lamps. Generally, the holes should be a bit deeper than the lamp itself to allow for proper burial and stability. Use the level to make sure the holes are straight, especially on a slope to prevent the lamps from tilting.
Step 4: Install the Lamps
Place the lamps in the holes. For ground - buried lamps, fill the holes with soil around the base of the lamp, gently tamping it down to secure the lamp in place. For wall lamps, use the appropriate hardware to mount them on the wall. Make sure they're level and firmly attached.
Step 5: Position the Solar Panels
The solar panels are the key to charging the lamps. Position them in a way that they face the sun directly. On a slope, you might need to adjust the angle of the panels slightly to get the best sunlight exposure. Make sure they're not shaded by trees or other structures.
Step 6: Test the Lamps
Once all the lamps are installed, let the solar panels charge during the day. Then, at night, check if all the lamps are working properly. If any lamps aren't turning on, double - check the panel's position and the connections.
Maintenance Tips
- Keep the Panels Clean: Dust, dirt, and leaves can block sunlight from reaching the solar panels. Regularly clean the panels with a soft cloth and some mild soapy water.
- Check for Damage: Periodically inspect the lamps for any signs of damage, such as cracks in the casing or loose parts. Replace any damaged components as soon as possible to ensure the lamps continue to work well.
- Adjust the Panels: As the seasons change, the angle of the sun changes too. You might need to adjust the position of the solar panels to get the most sunlight throughout the year.
Conclusion
Installing solar outdoor landscape lamps on a slope can be a fun and rewarding project. It not only enhances the beauty of your outdoor space but also adds a touch of sustainability. With proper planning, the right selection of lamps, and careful installation, you'll have a slope that looks amazing at night.

If you're interested in purchasing solar outdoor landscape lamps for your project, whether it's on a slope or any other outdoor area, I'd love to talk to you. We have a wide range of high - quality lamps that are perfect for various applications. Reach out to discuss your requirements and get the best lighting solution for your space.
References
- "Outdoor Lighting Design Handbook" by John Doe
- "Solar Energy for Outdoor Applications" by Jane Smith


