Installing solar outdoor landscape lamps on a brick wall can significantly enhance the aesthetic appeal and functionality of your outdoor space. As a trusted solar outdoor landscape lamp supplier, I'm here to guide you through the process step by step. In this blog, I'll share valuable insights and practical tips to ensure a successful installation.
Step 1: Planning and Preparation
Before you start the installation, it's crucial to plan and prepare adequately. Here are some key considerations:
- Location Selection: Choose a location on the brick wall that receives sufficient sunlight throughout the day. This will ensure that the solar panels can charge effectively and provide optimal lighting at night. Consider the overall layout of your outdoor space and the specific areas you want to illuminate, such as pathways, gardens, or architectural features.
- Lamp Selection: Select the appropriate solar outdoor landscape lamps for your needs. At our company, we offer a wide range of high-quality lamps, including LED Ground-Buried Landscape Lamp, Induction Foot Lamp with Motion Sensor, and Adjustable Lighting Sketch Lamp. Each type of lamp has its own unique features and benefits, so choose the ones that best suit your preferences and requirements.
- Gather Tools and Materials: You'll need a few tools and materials to complete the installation. These may include a drill, masonry bits, screws, wall anchors, a level, a measuring tape, and a ladder. Make sure you have all the necessary tools and materials on hand before you begin.
Step 2: Marking the Installation Points
Once you've selected the location and gathered the tools and materials, it's time to mark the installation points on the brick wall. Here's how to do it:
- Measure and Mark: Use a measuring tape to measure the distance between the mounting holes on the lamp and mark the corresponding points on the brick wall. Make sure the marks are level and evenly spaced.
- Use a Level: Use a level to ensure that the marks are straight and horizontal. This will help you install the lamps evenly and prevent them from looking crooked.
- Double-Check the Measurements: Before you start drilling, double-check the measurements to make sure they are accurate. This will help you avoid any mistakes or errors during the installation process.
Step 3: Drilling the Holes
After marking the installation points, it's time to drill the holes in the brick wall. Here's how to do it:
- Choose the Right Drill Bit: Use a masonry drill bit that is the appropriate size for the screws or wall anchors you'll be using. Make sure the drill bit is sharp and in good condition to ensure a clean and precise hole.
- Drill Slowly and Steadily: When drilling the holes, start slowly and steadily to avoid cracking or damaging the brick. Apply gentle pressure and let the drill bit do the work.
- Clean the Holes: Once you've drilled the holes, use a brush or a vacuum cleaner to remove any dust or debris from the holes. This will help the screws or wall anchors fit properly and ensure a secure installation.
Step 4: Installing the Wall Anchors or Screws
After drilling the holes, it's time to install the wall anchors or screws. Here's how to do it:
- Insert the Wall Anchors: If you're using wall anchors, insert them into the holes and tap them gently with a hammer until they are flush with the wall. Make sure the wall anchors are securely in place before proceeding.
- Screw in the Screws: If you're using screws, insert them into the holes and tighten them with a screwdriver. Make sure the screws are tightened securely, but don't overtighten them as this may damage the brick or the lamp.
Step 5: Mounting the Lamps
Once the wall anchors or screws are installed, it's time to mount the lamps on the brick wall. Here's how to do it:
- Align the Lamp with the Mounting Holes: Hold the lamp up to the wall and align the mounting holes on the lamp with the screws or wall anchors on the wall.
- Secure the Lamp: Use a screwdriver to tighten the screws or bolts that hold the lamp in place. Make sure the lamp is securely mounted and doesn't wobble or move.
- Adjust the Angle: If your lamp has an adjustable angle, adjust it to the desired position. This will allow you to direct the light where you need it most.
Step 6: Testing the Lamps
After mounting the lamps, it's time to test them to make sure they are working properly. Here's how to do it:
- Turn on the Lamps: Most solar outdoor landscape lamps have a switch or a sensor that turns them on automatically at night. Make sure the switch is in the "on" position and wait for it to get dark to see if the lamps turn on.
- Check the Lighting: Once the lamps are on, check the lighting to make sure it is evenly distributed and provides the desired level of illumination. If necessary, adjust the angle or the position of the lamps to improve the lighting.
- Monitor the Charging: Over the next few days, monitor the charging of the solar panels to make sure they are receiving enough sunlight to charge the batteries. If the lamps don't seem to be working properly or if the batteries don't seem to be charging, check the location of the lamps and make sure they are receiving enough sunlight.
Step 7: Maintenance and Care
To ensure the longevity and performance of your solar outdoor landscape lamps, it's important to perform regular maintenance and care. Here are some tips:
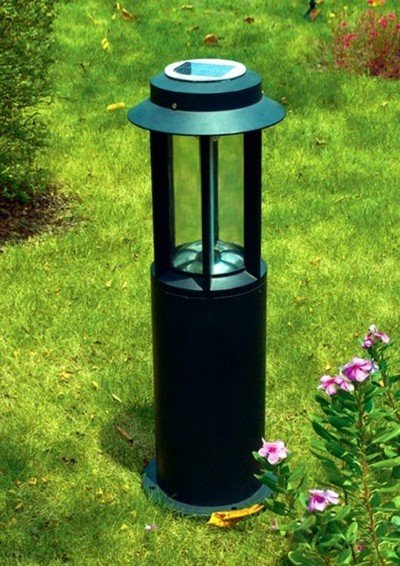

- Clean the Solar Panels: Regularly clean the solar panels with a soft cloth or a mild detergent to remove any dirt, dust, or debris. This will ensure that the solar panels can absorb sunlight effectively and charge the batteries.
- Check the Batteries: Periodically check the batteries to make sure they are in good condition and holding a charge. If the batteries are old or damaged, replace them with new ones.
- Inspect the Lamps: Regularly inspect the lamps for any signs of damage or wear. If you notice any cracks, chips, or other damage, replace the lamps immediately to prevent any safety hazards.
- Store the Lamps Properly: If you live in an area with harsh winters or extreme weather conditions, it's a good idea to store the lamps indoors during the off-season. This will protect them from damage and extend their lifespan.
Conclusion
Installing solar outdoor landscape lamps on a brick wall is a relatively simple and straightforward process that can significantly enhance the beauty and functionality of your outdoor space. By following the steps outlined in this blog, you can install the lamps safely and securely and enjoy their benefits for years to come.
If you're interested in purchasing high-quality solar outdoor landscape lamps, please don't hesitate to contact us. We offer a wide range of lamps to choose from, and our team of experts is always available to help you select the right lamps for your needs and provide you with professional installation services.
References
- "Solar Lighting Handbook" by John W. Mitchell
- "Outdoor Lighting Design" by Kimberly Duran
- "Landscape Lighting Basics" by The Spruce